Each user must have a user security role and a user profile defining what they can access.
- Assign each system user (BASYS UniData database ID) to a role to govern access to sessions, functions, and fund-level data.
- Add a Member Control to control access to a particular group of member's data.
- Create an Employer Control to control access to a particular group of employer's data.
- Add a Sensitive Data Control to mask the actual values for employer or member's sensitive data like social security numbers (SSN/SIN), Protected Health Information (PHI)
 Any health information that could identify a person. This can include a person's past or present medical status or condition, payments made for health care, and health care services received., or salary information.
 - Configure additional administration view settings.
Set up a user profile
Go to: Home > System Administration > Security > Authorization Profile Editor
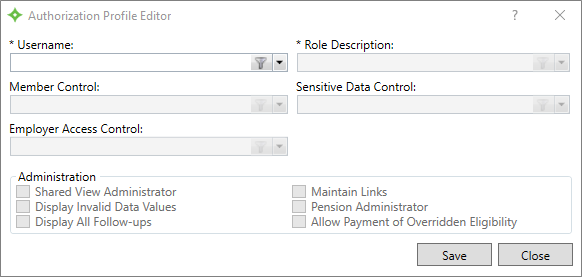
- Select the UniData database user ID from the
Usernamelist. - In
Role Description, select a role. - Select the appropriate controls from the options.
- Choose any Administration options to apply to the profiles.
- Click
Saveto apply the updates to the user's profile.
* indicates a required field
| Field | Description |
|---|---|
|
Username |
The UniData database user ID. An ID can only be associated with one profile. |
|
Role Description |
The description of the role. The roles that display are those already created in the system. See Manage system security and data access for details. |
|
Member Control |
The member control identifies the members (and dependents) this profile can't access . See Member Control for details. |
|
Sensitive Data Control |
The sensitive data control identifies the types of data that will be masked in tabs, windows, navigation panes, tables, etc. See Sensitive Data Control for details. |
|
Employer Access Control |
The employer control identifies the employers that this profile can't access (black-listed; exclusion list). See Employer Control for details. |
|
Administration |
Note: To ensure consistency and avoid duplicate views, give the Shared View Administrator functionality to a limited number of users with the business knowledge and experience to create and define custom views and manage the shared views.
Note: Give this functionality only to supervisors in each department.
|
Update a profile
- Select the UniData database user ID from the
Usernamelist. - Make changes to the profile's settings as necessary.
-
Click
Saveto apply the changes.